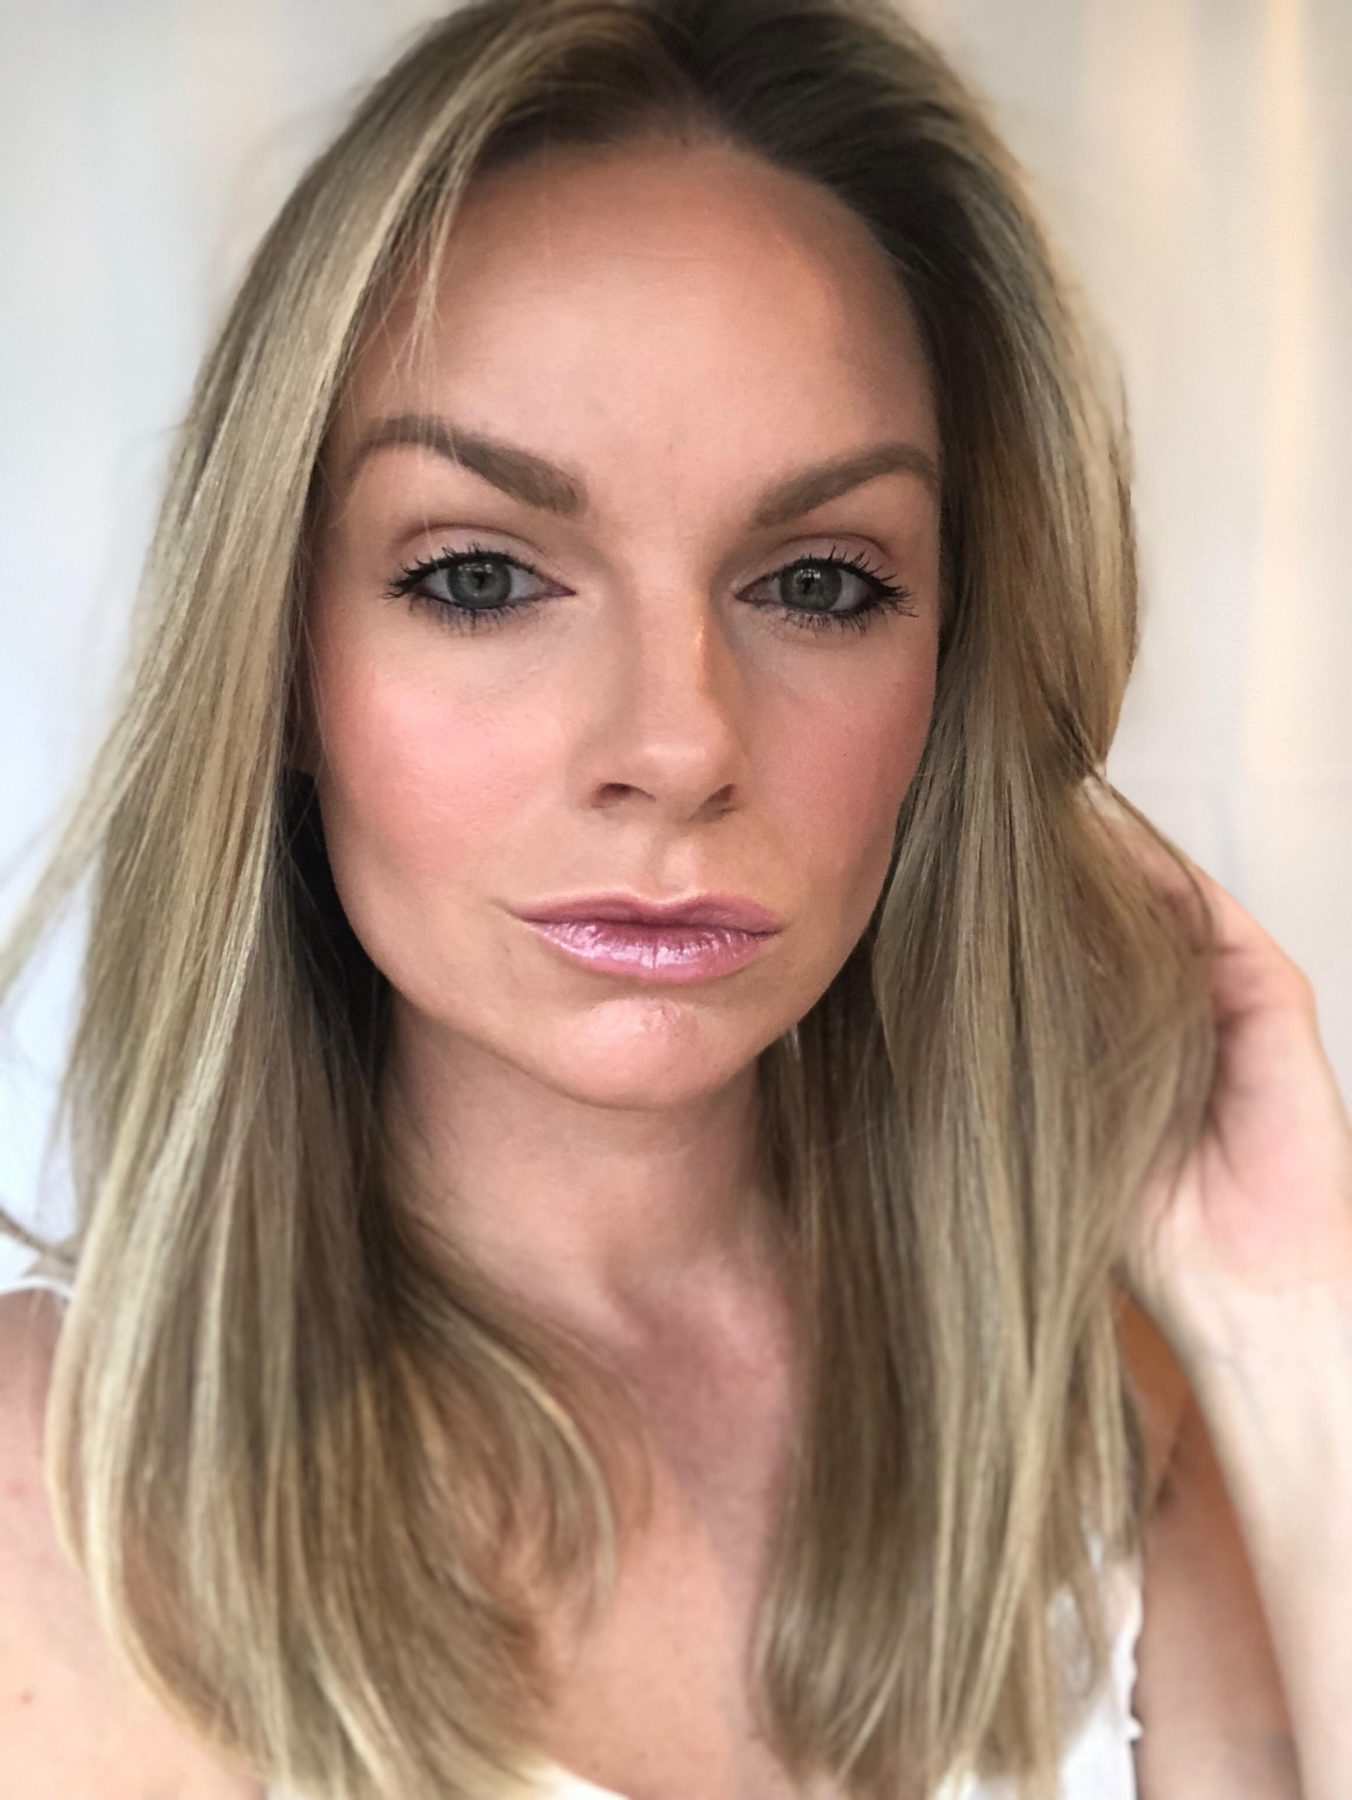
Achieving a natural, glowy look on your wedding day can be tricky because most brides want lasting coverage that will last throughout the day and shoot well in photographs. Luckily as a make-up artist, I have had the chance to test out my technique of giving my brides long lasting makeup that is natural, glowy, and photographs beautifully and it works fantastic.
For me, after my twenties and having two kids, I lost my youthful glow. I also gained some new challenges– dark circles, Rosacea, broken capillaries, adult acne, dry skin in the winter, etc. I usually don’t feel comfortable without makeup to make my skin feel and look “normal.”
To create natural, glowy skin again through makeup, I use corrector and foundation to give me the even skin tone I desire and then go in with some cream contour and blush to give my skin the dimension and beautiful colors back. Finally, I add highlight to really pick up the light and reflect glow in the areas where I want it.
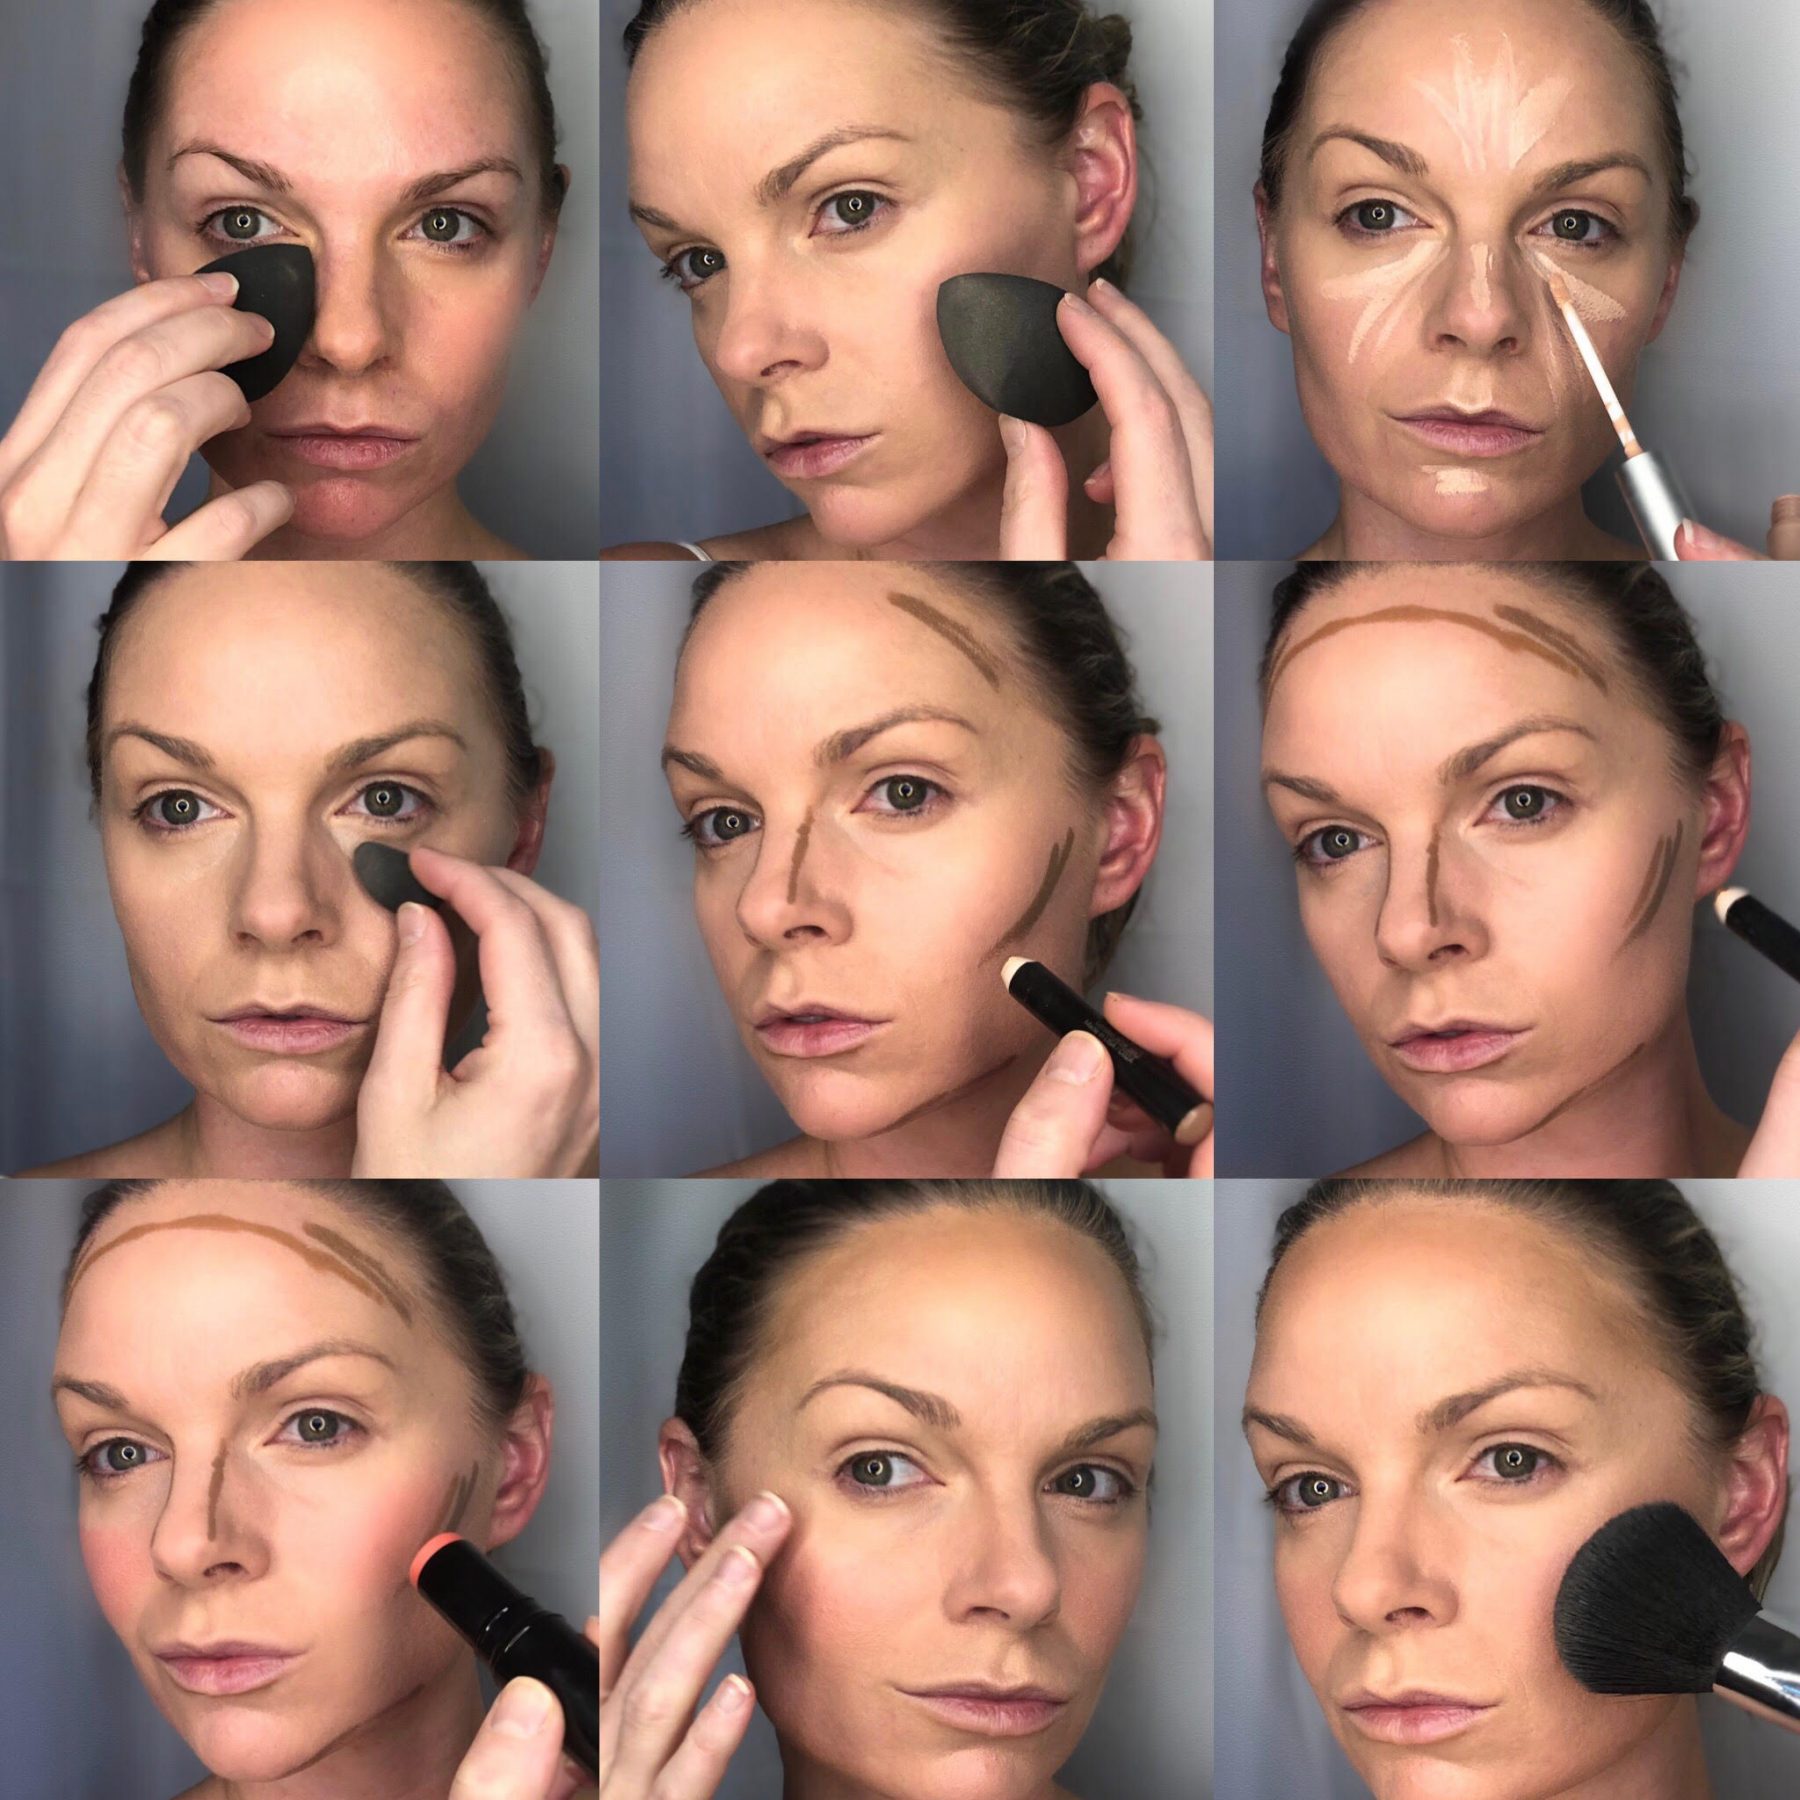
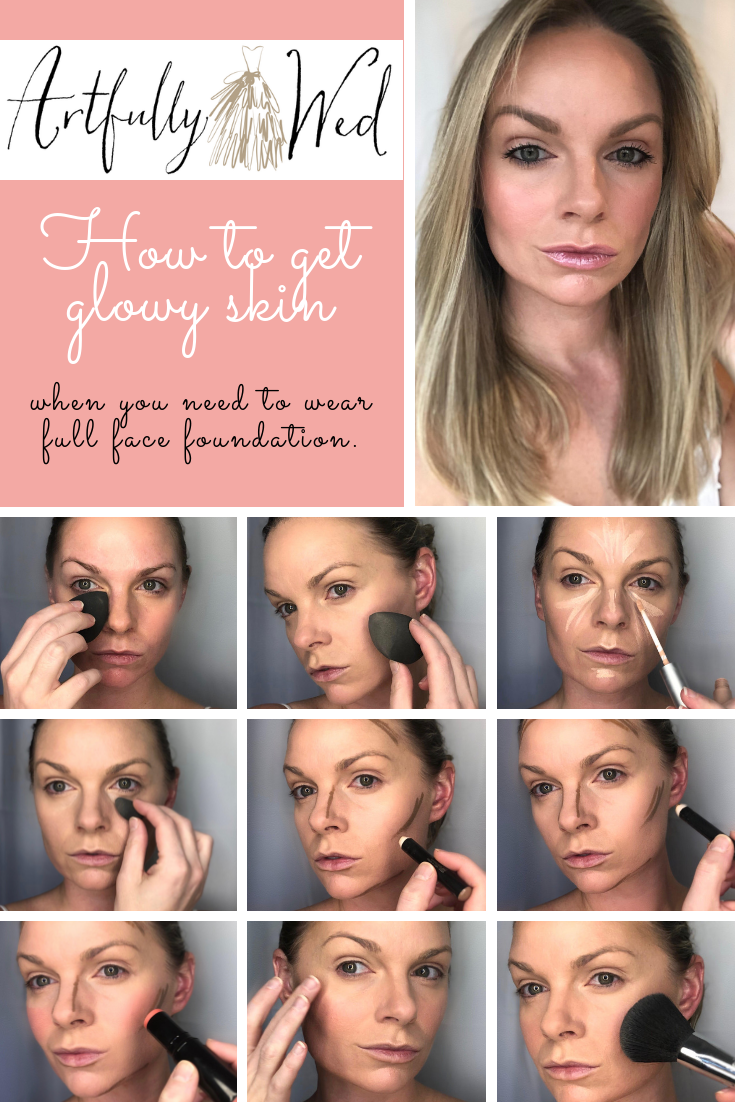
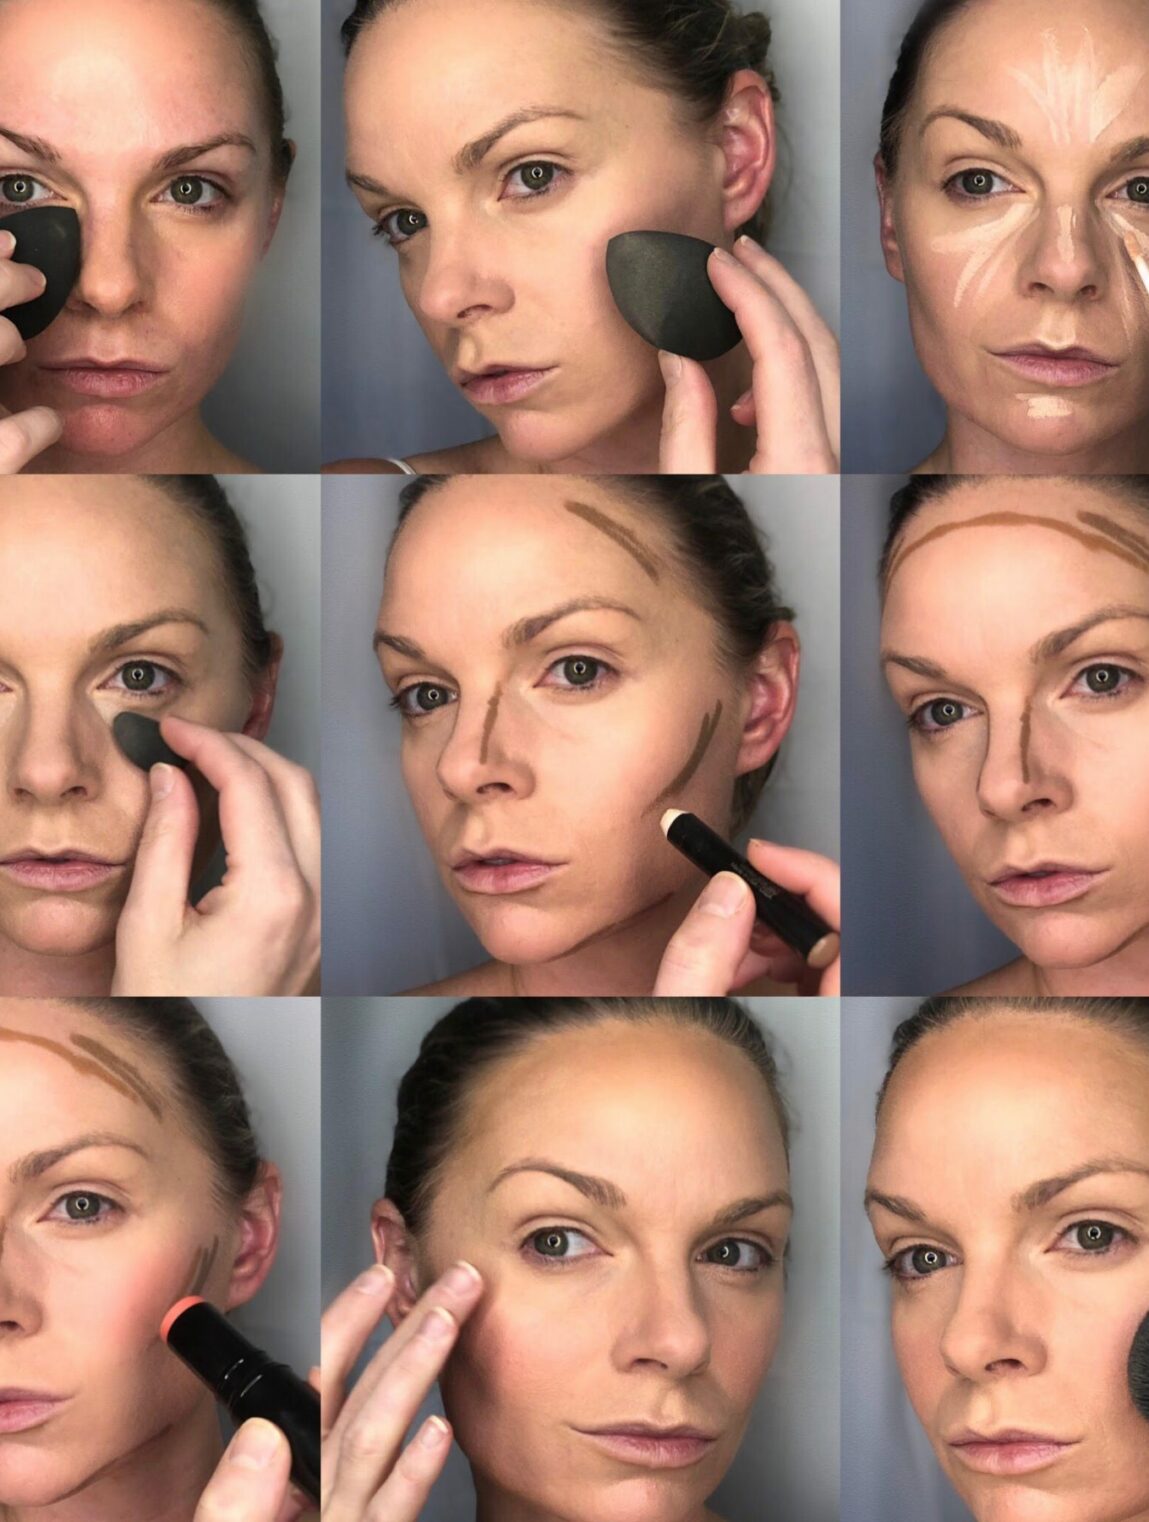
Here is an easy to follow tutorial on how to get glowy skin when you need to wear full face foundation.
- First, I add a peach corrector to my clean and moisturized face. I blend a small amount over my dark circles and any spots I don’t want to show through. I use LA Girl’s peach corrector or Giorgio Armani’s correctors for this step and blend with an Aesthetica beauty blender.
- Next, I apply my foundation overtop my corrector and all over my face. I use my beauty blender to press it into my skin and even out all the coverage on my face. I love Giorgio Armani’s luminous silk foundation for light coverage and radiant finish. If I’m working with a really oily client or someone who wants full coverage, I opt for Armani’s Power Fabric foundation.
- Start the highlight contour process by adding a brightener on the high points of your face, upside down triangle under your eye, stroke in the middle of your nose, Cupid’s bow, middle forehead and top of the chin. I use Trish McEvoy Instant eye lift for this step.
- Once that is blended, I start some of my sculpting contours by using a cream stick product like the Smashbox contour stick trio. Creams are much easier to control and great for beginners in contouring. I take the contour labeled stick and draw a line under my cheekbones following their curve, around my hairline and sides of my nose. I also draw one under my jawline slightly and under my bottom lip close to the lip line.
- The bronzer stick is used to trace right above your cheekbone line and directly under your hairline contour line.
- Add a cream blush like this Chanel Les Beiges cream blush and apply on the apples of your cheeks right above your bronzer line. Blend with your blenders until your lines disappear and blot blend your blush.
- The highlight step is key and you can use your fingers to press in a cream highlighter like this Bobbi Brown glow stick into your highlight contour areas, orbital bone, middle nose, Cupid’s bow, top of the chin.
- Finally, set your look with a translucent setting powder. This step isn’t necessary if you have very dry skin, but it will help your makeup last throughout the day for sure, so I highly recommend it. I like this NYX blotting powder for setting my makeup. It’s a matte blotting powder technically so it’s great to have on hand for touch-ups, as well. Use a pillowy powder brush, tap into the powder, tap the excess off and dust a light veil over everything, even under your eyes.
- Last but not least, feel free to go over these steps with a powder bronzer, blush, and highlighter. Doubling up will give you more intensity and if you have oily skin, you will like the extra layer of powder. Overall these steps will give you a dewy radiant finish and will look amazing in your photographs, as well.
It may take a little practice, but it really is as simple as it looks. Plus, you can test out the look for your engagement photos, for your rehearsal dinner, bridal showers and more. You can also contact me directly at Danielle Paquin Looks and I would be happy to consult with you.